

How To Make A Bellows
How to Brand A Fireplace Bellows
VIDEO
In this video, I show how to brand a fireplace bellows. These have been used for centuries to keep fires going while saving your lungs from having to do the work. Take a look:
Background
We alive in Mississippi and it is very humid here. Then much so that it is difficult to get a fire to stay lit at times. The wood seems to be damp, fifty-fifty on my woodpile. Then, for our outdoor fireplace, we actually needed something to help keep the burn going.
I was tired of bravado on the fire all of the time, so the fireplace bellows was definitely a necessity.
TOOLS & MATERIALS
(These are chapter links. Clicking on them and buying anything on amazon helps support me, at no extra cost to y'all.)
Miter saw - http://amzn.to/2GxJbX4
Drum sander - https://amzn.to/2qyElSQ
Carpet tape - https://amzn.to/2vja3ck
Bandsaw - http://amzn.to/2BI2xJV
Files - https://amzn.to/2JM32UC
Random Orbit Sander - http://amzn.to/2GPjaUo
Spokeshave - https://amzn.to/2H1KUnW
Upholstery tacks - https://amzn.to/2IY9eru
Contact cement - https://amzn.to/2vgQxgF
Pipage cutter - https://amzn.to/2ELyfn7
5 Infinitesimal epoxy - http://amzn.to/2pw2zxp
Miter saw - http://amzn.to/2GxJbX4
STEPS
I started out by hand-drawing a shape that I liked. Since both sides of my drawing were non completely symmetrical, I used . fox that I've picked up over the years. Choose which side of the drawing that yous like most. Then, discover the heart point of your entire drawing. Draw a line down the heart, and fold it in one-half. Trace on the outside of the side y'all liked best onto the at present folded side. Then, unfold and cut it out. It should be perfectly symmetrical. This is an like shooting fish in a barrel way to go both sides of a shape perfectly symmetrical, fifty-fifty if you describe them by hand.


I grabbed a piece of maple that was most an inch thick and cut out two pieces on the miter saw. Each time I use my miter saw since adding on the support artillery makes me really glad that I did that project. It is and then much easier and safer to handle material now. I don't remember the exact length of this bellows, but I was making mine longer/larger than most I have seen. I will be the principal user of this, and I have long arms, so I wanted it to exist able to attain the burn down easily without me having to bend down every bit much.
Next, I stuck the two boards together with some carpeting tape, traced out the design from my template onto the boards and took it over to the bandsaw to cut out the shape. I stayed outside of my line but a little and so I could refine it later. I refined that line and shape with some files, rasps, a spokeshave and a random orbit sander. Really anything y'all have will work hither...just then long as y'all can polish out your shape and get rid of any tool lines the bandsaw left on the edges.


I shaped the handles with a number of tools starting with rasps and files, then moving on to the spokeshave and finally, the random orbit sander.


Next, I drilled a through hole in one of the sides. This would be part of the valve that makes the whole thing piece of work. I also took that side to the bandsaw and cutting off a portion of the tip. Information technology is kind of difficult to explain (I recall I explicate it actually well in the video, because I can kind of show y'all), just this will become the hinge for the entire machinery. The tip that I cut off gets glued back onto the other piece. Then, the at present shorter piece can hinge and move with assist from the leather.


Next, I used some contact cement to aid attach the leather to the inside of the hole. Contact cement works by applying it to two different surfaces, letting it dry for nearly 15 minutes so that it is just tacky to the touch, and then sticking the two surfaces together. The contact cement on either surface adheres to itself creating quite a strong bond.

Now, on to the leather.
I plant this to be one of the well-nigh tricky parts of the entire build. With it being such a fluid shape, it was actually difficult to figure out how much leather I would need, and just how to draw out where my cuts would need to fall to accommodate the handles, etc. Some of information technology ended upwardly just being trial and mistake, merely I did a pretty good job not having also much waste in the finish. There was but one kind of large flake, but I'll be able to use that for some other projection in the future. Information technology will not get thrown abroad.
This is 5.5 oz leather, so it is pretty thick. That made it a little more hard to work with, only sure do love the look and experience of the finished slice. It is substantial!


The valve mechanism is and so simple in this bellows. I used to think it was some actual hardware inside of these, but information technology is simple mechanics. The through hole in one of the sides acts as an air intake. There is a slice of leather secured on three sides on the inside of this hole, with a trivial slack toward that fourth side. When you expand the bellows, it sucks air into the inside through the pigsty. Then, as yous collapse it down, all of the air on the inside of the bellows presses on that leather "valve" on the inside, forcing information technology shut, and forcing the air to get out the only other place it tin can...the tip. This works surprisingly well, and information technology is and so simple. I would love to know who offset came up with it. I detect that a petty air leaks out of the intake hole, but it is definitely not enough to hinder the air coming out the tip from beingness very potent.
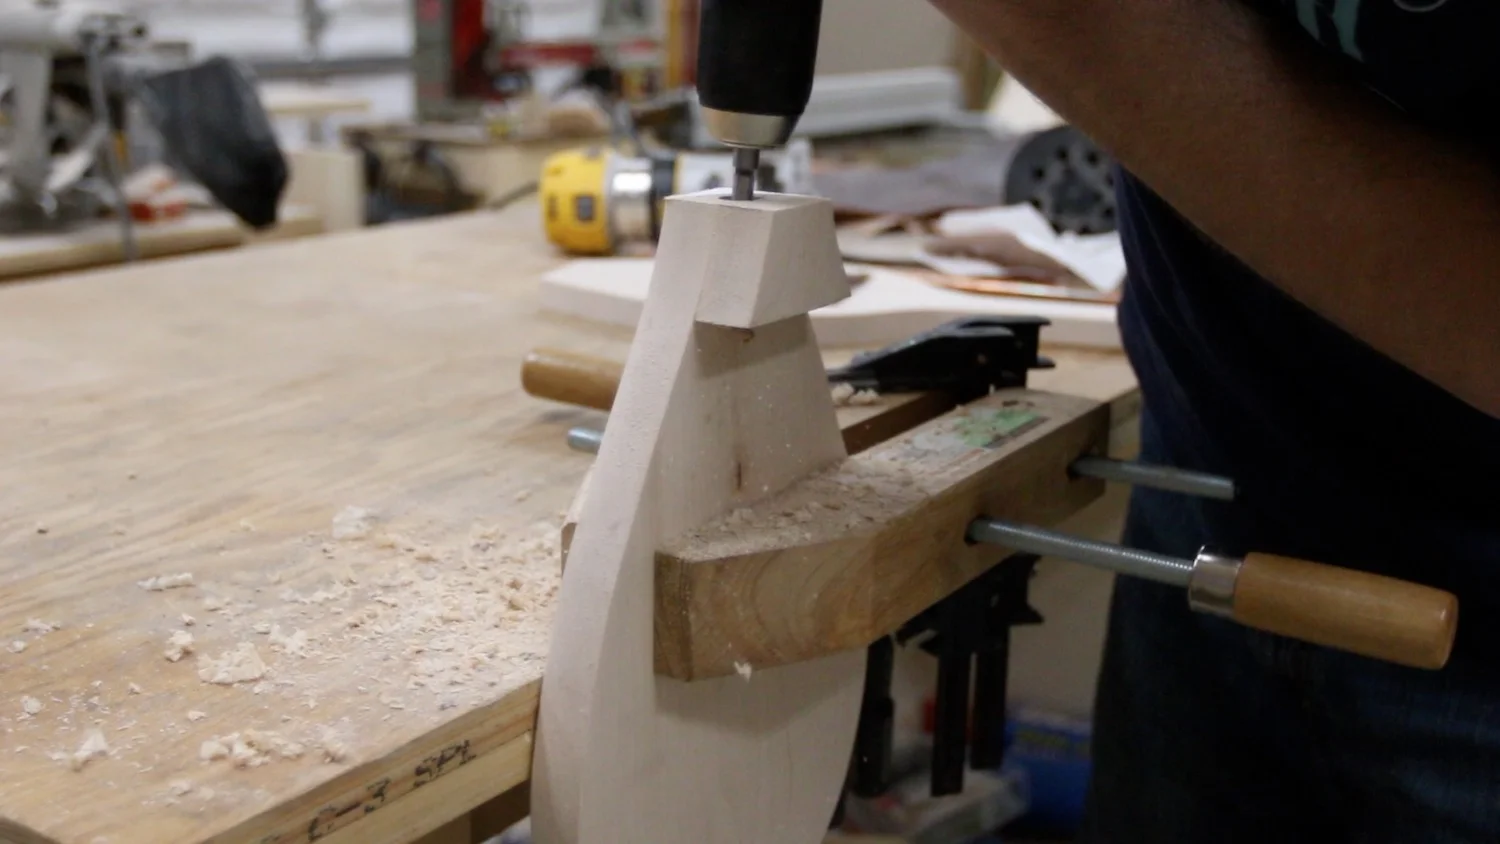
The side by side footstep was to drill a through hole in the tip for the copper pipe I would be using. I did this with a handheld drill, and ended upward having to cut off a bit more of the tip of the shape since the drill bit I had was not long enough to get all of the mode through. I too used some chisels to hollow out more of a channel on the within, just inside of the piping. Maybe I didn't need to do this, but I wanted plenty of infinite for the air to go down the pipe.
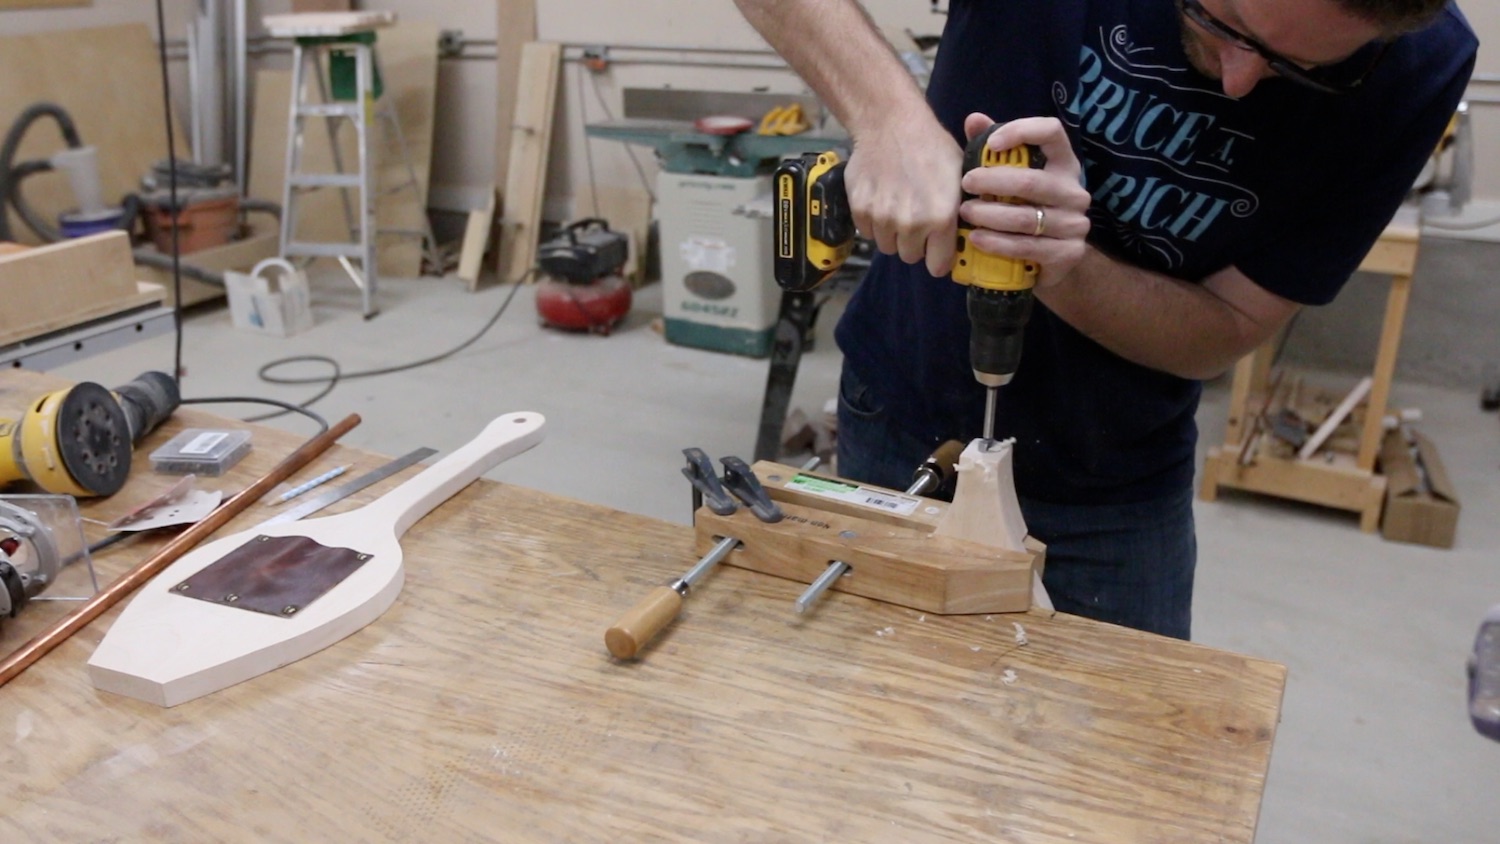
I cut some 1/2" copper pipe I had with a simple pipe cutter, and used some epoxy to affix it inside the tip of the bellows.

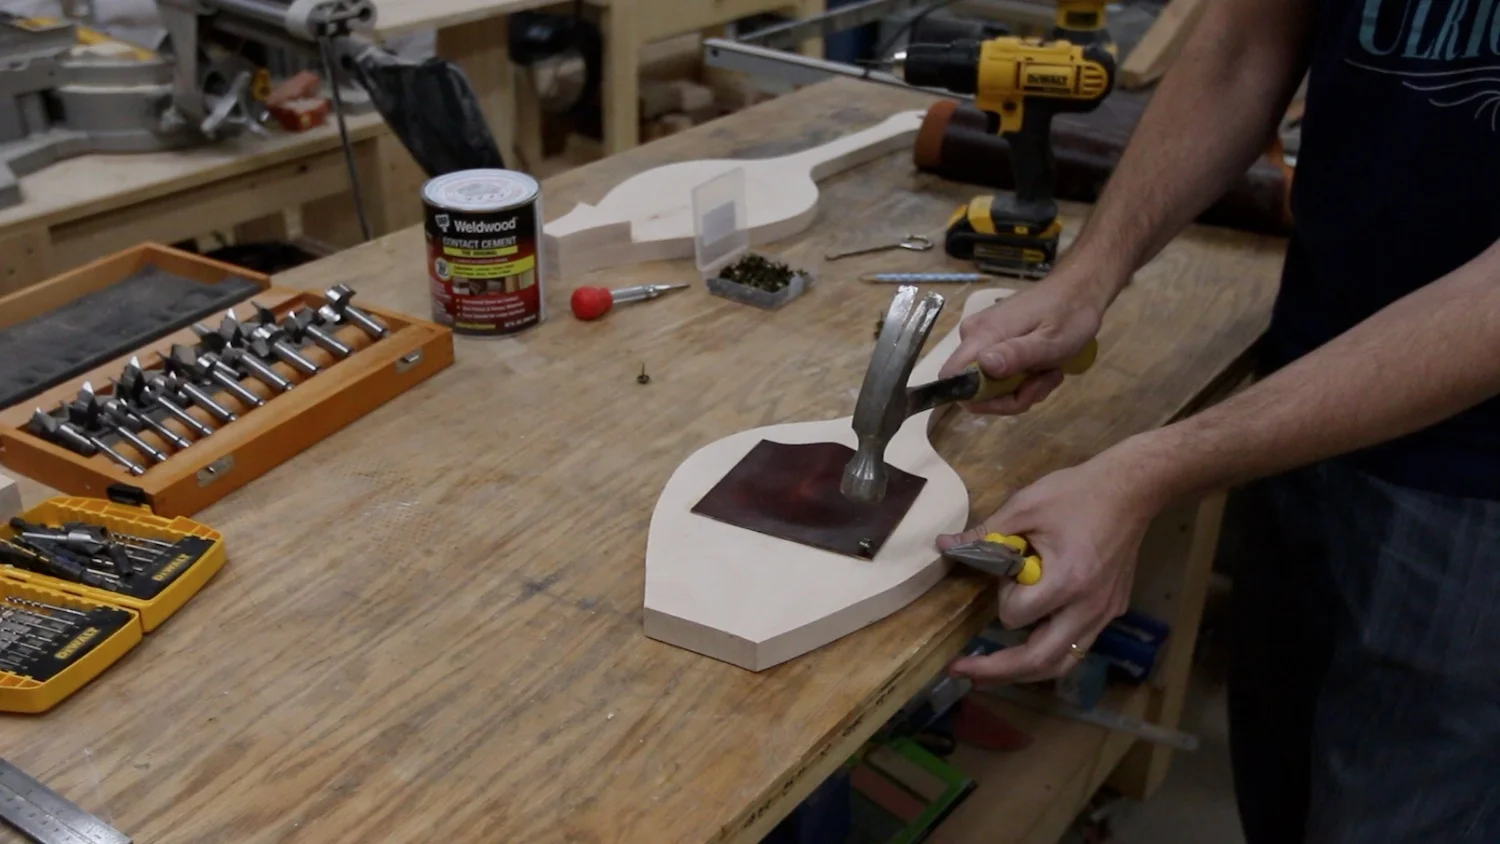
Next, I turned my attention back to finishing the leather. I added some more contact cement to both the leather and the sides of the maple. I adhered the leather on 1 side to the wood, and so flipped information technology over to add together some upholstery tacks. These seemed to piece of work best when I started off holding them with some needle nose pliers and then driving them home the rest of the manner with the hammer. Every once in a while, one of them would get turned in such a way that it was ruined, but that's simply how nails go sometimes. I've seen some other people predrill a hole so they don't dissever the wood as they nail these into information technology, only mine were small enough, there was no need.


I made my manner around, measuring the distance between each tack with my compass gear up to about 2". This simply seemed similar a nice spacing. I'grand glad I did this, because it turned out looking really great!
On the other side, I just had to really work with the leather to brand sure I was giving it plenty of travel room to move. Equally I worked back toward the handles, I had to cut the leather to allow it to go effectually the handle. And then, on the summit handle, I had to do a bit of folding of the leather to get it to work right. I just fastened information technology at the folds with some more tacks, and it seemed to work well.
The terminal role of the leather working was calculation another, smaller piece to the very front of the bellows. This covers the "hinge" part and makes it equally air tight as possible. The only thing to actually sentinel out for is how high up you go. I got lucky...I went pretty high up on the bellows, and I was worried at first that the leather would not be able to stretch to accommodate the opening of it. If you go along it closer to the tip of the bellows, you will not have as much trouble with this.


Next, I but trimmed off the excess leather, sanded information technology all again by hand (including the edges of the leather) and added some mineral oil to the maple. I didn't want another end that would become all over the leather, so I just opted for a clean and simple mineral oil. I can reapply every bit the piece needs information technology, and it has a overnice, organic feel.


The final part was to burn my logo into the leather with my new branding iron. (It is so satisfying!)


Determination
I came across some things in this project that challenged me, and I'm better for information technology, despite what I experience in those moments. During the build, it can be incredibly frustrating to run into snags, only I usually acquire from them, and later on the project is over, I have grown equally a maker. Do your projects help you grow every bit a maker? What did you lot think of this project? Practise you have a bellows? Did you fifty-fifty know what I bellows was until you saw this? Let me know what yous retrieve below, and thank you for following forth with the project! Don't forget to watch the video!


Source: https://www.bruceaulrich.com/blog/how-to-make-a-fireplace-bellows
Posted by: bridgessprione1977.blogspot.com
0 Response to "How To Make A Bellows"
Post a Comment